Hello Harvest–Pumpkins and Flowers!

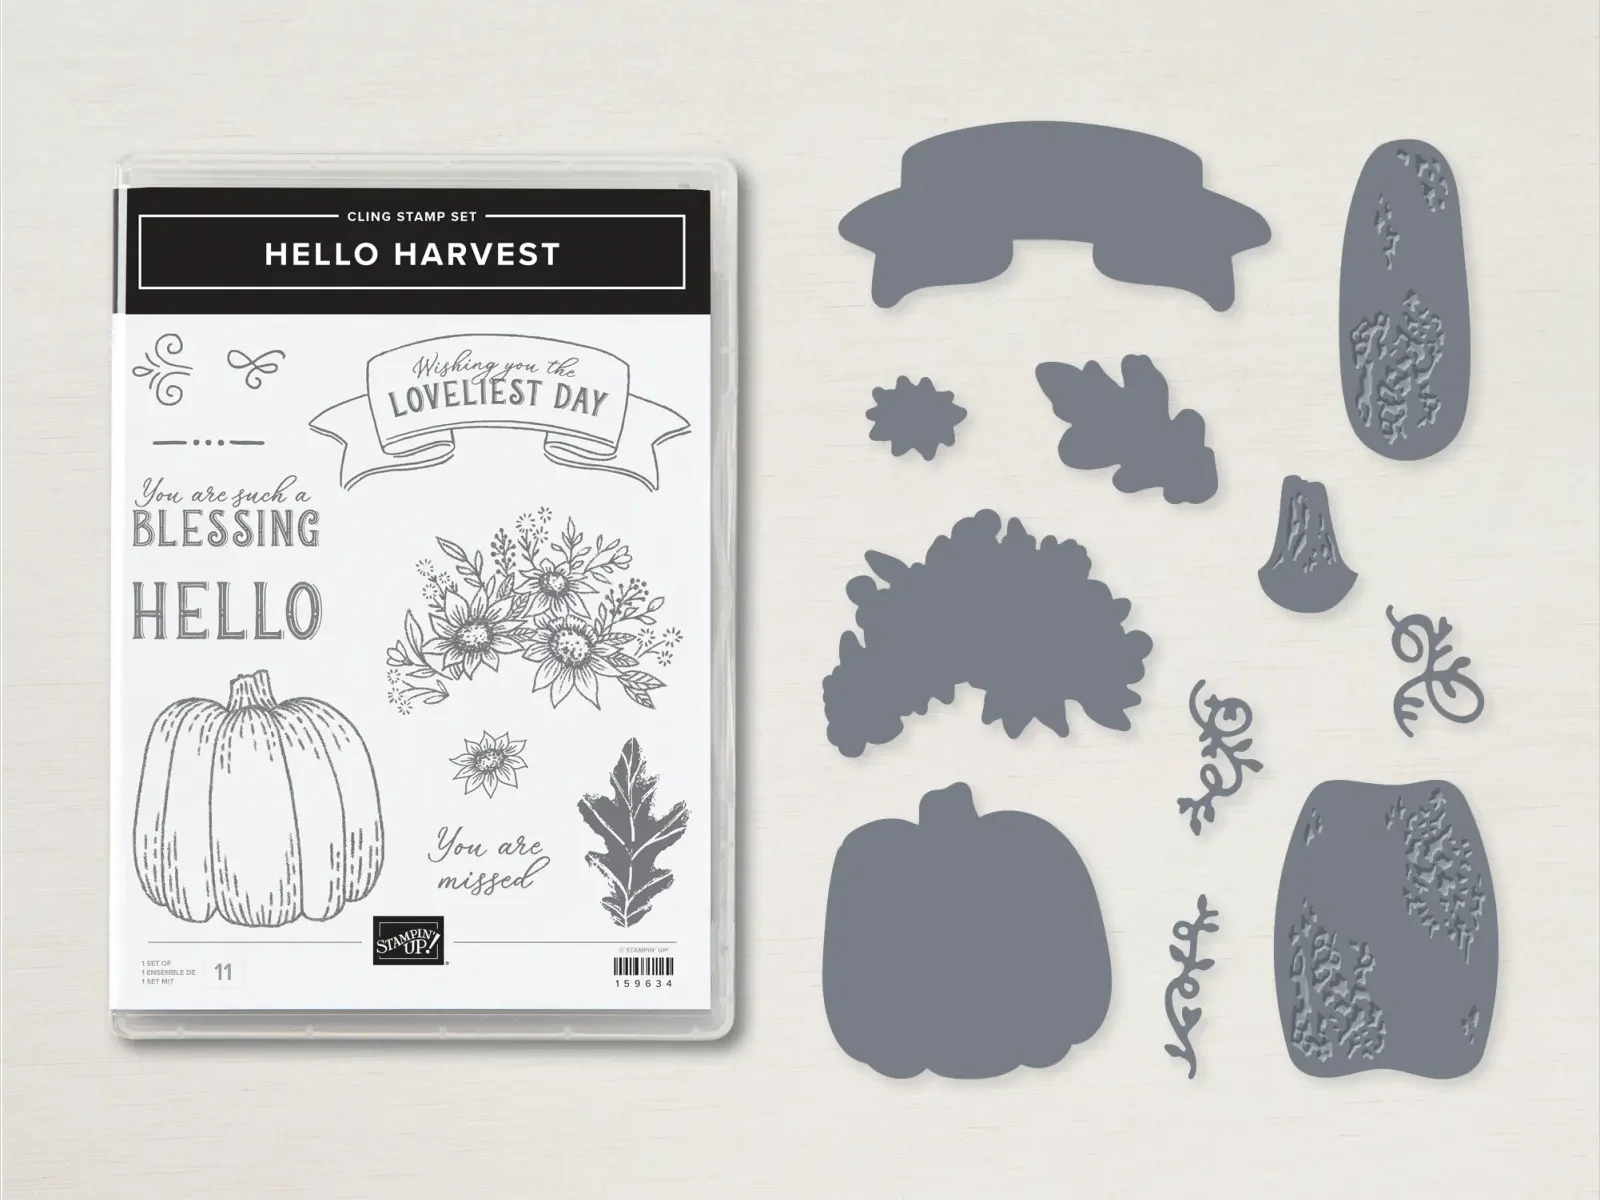
Well, it’s officially fall! Here in Central Florida, that means…it’s still really hot! Nice to have some beautiful autumn stamps and dies to get me in the autumn spirit. Enter…Hello Harvest! This is a beautiful suite with pumpkins, flowers, and gorgeous designer series paper.

In addition to making cards, I am an AFOL–Adult Fan Of Lego. I just knew this Lego set would be the perfect background for my fall cards! This card contains the following elements:

  • Cajun Craze card base
  • 5-1/4 x 4 inch Crushed Curry
  • 5-1/8 x 3-7/8 inch designer paper from Rustic Harvest DSP

The leaves are stamped in Crushed Curry, and the short pumpkin is colored with Pumpkin Pie and Old Olive Stampin’ Blends. The tall pumpkin is die cut from Crushed Curry and Mellow Moss cardstocks. I added two jewels from the Leaf Label and Amber Gem Combo Pack and adhered the sentiment with dimensionals.

The Rustic Harvest Suite is on pages 48-50 of the July-December 2022 Mini Catalog.

This card features the same suite. The flowers are colored with Stampin’ Blends in Daffodil Delight, Old Olive, Pumpkin Pie, and Cherry Cobbler. (The inside of the flowers is done with brown Copics.) You can’t see the shimmer in the photo, but the yellow flowers have Clear Wink of Stella brushed on them. They are so pretty!

Happy Fall Y’all!

Continue ReadingHello Harvest–Pumpkins and Flowers!

Adorable Fairy Trick or Treat Card

This card is SCARY CUTE! Actually, that is the name of the stamp set! It has such cute trick or treaters, including this adorable fairy. I stamped her in Gorgeous Grape ink and die cut it with a stitched rectangle die. I also die cut the bats and the moon with the matching dies in the Scary Cute bundle.

This is on page 56 of the July-December 2022 Mini Catalog

The card base is Slate Gray, with a layer of Gorgeous Grape cardstock as a mat for the designer paper layer. The purple mat really brings the card together as it coordinates with the fairy. The banner is cut using the banner punch. I love the look of the glitter washi tape. It is so pretty! Two finishing touches: the bats are brushed with some sparkle using a Wink of Stella glitter brush, and five silver self-adhesive dots. Perfectly scary AND cute!

Continue ReadingAdorable Fairy Trick or Treat Card

Love These Cute Witch Hat Shaker Tags!

Yes, these take a bit of time, but they are SO worth it! They are made with the new Celebrate With Tags Bundle, available in the July-December 2022 Mini Catalog on page 67. As you can see in the photo, it has dies for two different tags. I used the one on the right to cut Pumpkin Pie cardstock. I used the Black & White Designs DSP for the inside of the tag and the outside. The dies include the rectangle that cuts out the window. Next, glue in a piece of Window Sheet, then fold it and glue the sides closed. For the shaker material, I used a sequin mix from Picket Fence Studios called Witches Brew. Finally, glue to top of the tag closed. Really fun!!

These three witch hats are first stamped. Pro tip: Use the Stamparatus for the first two hats that have a lot of black (or whatever color you choose). That way, you can ink up the stamp twice and get really good coverage. Then color them using Stampin’ Blends. I used Pumpkin Pie (dark), Granny Apple Green (light), and Highland Heather (light). The last hat was colored with both the dark and lights Pumpkin Pie and Highland Heather Stampin’ Blends. Use the Witch Hat Builder Punch to punch them out.

The last hat was punched using Gorgeous Grape cardstock. The hat band and stars were punched out of black cardstock that I layered with Glitter Washi Tape. The sentiment is from the Scary Cute stamp set. You can see it HERE.

I am super pleased with how they turned out. I can hardly wait to make more shaker tags!!

Continue ReadingLove These Cute Witch Hat Shaker Tags!

Glittery and Bewitching Card!

This is such a fun card to make and is super cute! I used the Bewitching Bundle, which includes three different hat stamps and the boots stamp, plus a the Witch Hat Builder Punch.

This is located on page 57 of the July-December 2022 Mini Catalog.

The card base is black topped with a layer of Pumpkin Pie cardstock. The diamond patterned die cut is from the Organic Beauty dies that come in the True Beauty Bundle. Adhering something with such thin lines can be difficult, but with Stampin’ Up’s adhesive sheets it is a breeze!

The hat is colored with Stampin’ Blends in Pumpkin PIe, Highland Heather, and Granny Apple Green to match the awesome glitter washi tape that I put on black cardstock. Black Stampin’ Dimensionals raise the white layer up so a little more glitter tape can show. The white layer was cut with Deckled Rectangles Dies, which I also used to die cut the inside layer of the card.

The “Happy Halloween” sentiment is from the retired Hallow’s Night Magic set.

The sentiment on the front of the card is from the Scary Cute stamp set on page 56 of the July-December 2022 Mini Catalog.

I am looking forward to more Halloween projects using this very scary cute stamp set!

Continue ReadingGlittery and Bewitching Card!

Candy Cane Christmas Cards Using the Stamparatus

I love Christmas, and I love making Christmas cards! My husband asked me, “Does it feel weird making Christmas cards in July?” I didn’t miss a beat. “Nope! It’s always a good time to make Christmas cards!” I’ve already made cards using the Lights Aglow Suite, so this time, I decided to play with the Sweetest Christmas Suite.

For this card, I die cut the candy canes from the Sweetest Christmas Designer Series Paper (DSP), then used three other patterns in the DSP on the card–seems like that is a LOT of different patterns, but they work so well together.

Sweetest Christmas DSP – page 9 in the July-December 2022 Mini Catalog

I also used the Scalloped Contour Dies and ribbon from the Red & Garden Green 3/8″ Ribbon Combo Pack.

The sentiment requires two stamps, so it is perfect for the Stampin’ Up! Stamparatus. This precision placement tool makes card making quick and easy when you have multiple items to stamp and the placements have to be in the correct place. Using the Christmas Banners stamp set, I put the banner on one of the Stamparatus plates, and the ‘Tis the Season sentiment stamp on the other plate. Then you just have to ink them up, swing the plate onto the paper, and apply gentle pressure.

Pro tip! Put the stamp set box underneath the plate. It’s the perfect height to give you a level surface to ink up the stamp.
Inking the sentiment stamp on plate #2.
The finished product!
All that is left is to die cut the sentiment and place it on the card using Stampin’ Dimensionals.

Using the Stamparatus is fun, efficient, and quick. It is worth its weight in gold if you are making multiple cards of the same design.

Continue ReadingCandy Cane Christmas Cards Using the Stamparatus